
Tools required
- something to cut the uprights with: ideally a radial arm saw, otherwise a circular saw or a jigsaw
- a drill a drill bit the same thickness as the screws
- a spanner or ratchet to tighten the bolts, or an impact driver (note: an impact driver is NOT a hammer drill. An impact driver allows you to drive screws or bolts in much more firmly and quickly) or a standard screwdriver
- a hammer for driving in your TRCC (round head, square neck) bolts
- depending on the height of your geodesic dome, a bench or ladder
Size of your screws and bolts
The bolts must pass completely through the thickest part of the upright and the connector. I therefore advise you to choose bolts that are approximately 20 mm longer than the greatest thickness of your timber.
If your bolts protrude by less than 10 mm, assembly will be much more complicated.
FOR EXAMPLE, if your timber is 40 x 70 mm, you will be drilling into the 70 mm side. You should therefore use an 80 mm or 90 mm bolt.
In terms of thickness, I recommend 8 mm bolts (= M8)
I recommend using bolts rather than screws. The assembly is much stronger, as the bolts go right through. But above all, assembling the dome will be easier.
Optimising your timber cuts and purchases
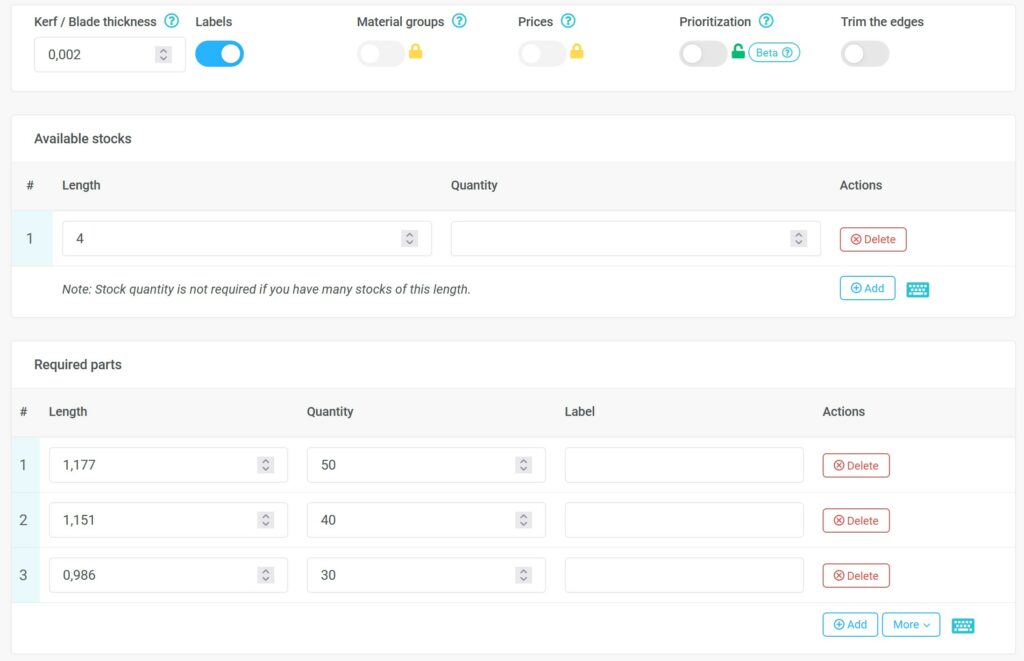
I recommend this free online tool to help you optimise your choice of timber and your cuts: Optimcutter
Here are the parameters, for example, for a 6-metre diameter dome (3V 3/8 NON Kruschke), 2mm-thick timber and 4-metre joists:
What timber should you use for the geodesic dome uprights?
I recommend using timber suitable for construction or decking, which offers good strength at a reasonable price.
The MINIMUM length and width of the uprights must be 30mm to ensure the structure’s stability.
Decking joists are a very good option, with dimensions of around 62x38mm or 70x45mm. These joists are also often treated to Class 3 or Class 4 standards, which gives the timber excellent resistance to rain.
Construction rafters and half-rafters (search for ‘construction timber’ on the websites of major DIY retailers) are often even cheaper and thicker, with dimensions of 75×50, but their treatment and resistance to rain is often inferior (usually Class 2 – this is yellow-coloured timber)
TIP: Choose your own timber at a major DIY store. Check that the timber isn’t warped and, above all, isn’t twisted. Twisted joists will make assembling your geodesic dome much more difficult!
TIP: If you plan to treat the timber, I’d advise doing so after cutting it but before assembly: it will be easier to paint or spray the timber whilst it’s flat rather than once the geodesic dome has been assembled.
TIP: Buy a few extra large uprights: you’ll need them to support the upper levels of the dome during construction.
PLEASE NOTE: if you choose struts wider than 38mm, you may need to chamfer some of them: test a 6-arm connector with your struts to see if the ends touch. If they do, chamfer them slightly.
Preparing to build the geodesic dome
During this preparation, we will:
- Cut the struts
- Drill holes in all the struts
- Insert all the screws
Prepare the site for the geodesic dome
Once you have determined the diameter of the geodesic dome using the table above, make sure you have sufficient space to install your dome and that the ground is sufficiently level.
Cut the uprights
Use the calculator on this page to work out the dimensions of the uprights.
Start by cutting the first upright and check that its length matches your requirements exactly.
Use this first post as a template: mark out the cutting line on the timber to be cut using this post. Remember to cut just beyond the cutting line, not on the line itself, to allow for the thickness of the blade.
Bevel certain joists if necessary
Depending on the thickness of your joists, it may be necessary to chamfer some of them before assembly to prevent them from touching each other at the connector. This problem usually occurs with certain 6-prong connectors.
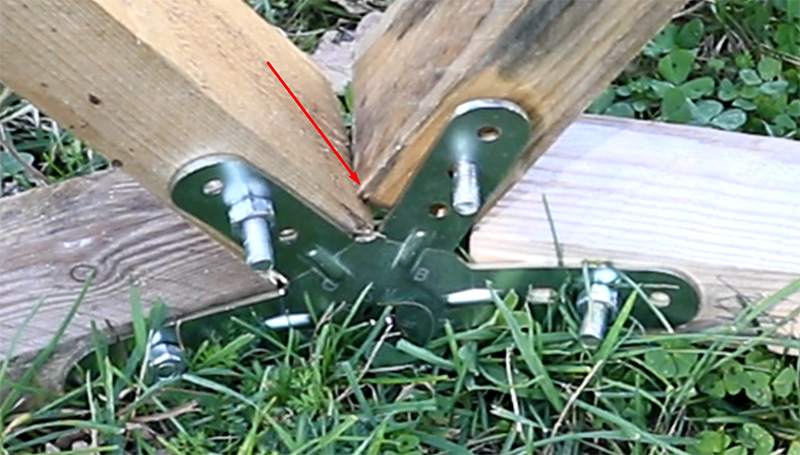
Further information on bevelling and spacing joists.
Drilling the uprights
You now need to drill the uprights to accommodate the bolts. Here again, great precision will help with the assembly.
The bolt hole must be 40mm from the end of the upright.
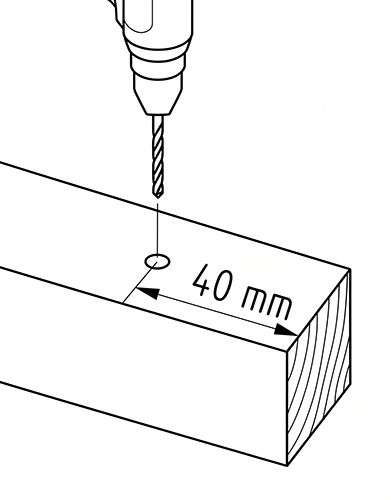
You must drill through the LONG side of the upright to ensure maximum stability for the dome.
Improve accuracy by making a drilling template
I strongly recommend that you make a drilling template.

Drill your first hole with great precision on one side of the first upright.
Mark the side where your drill bit entered: as you may not drill straight, only the side where you started drilling is accurate. The exit side may be offset. This isn’t a problem, but to be precise you must use the entry side as a guide.
Now turn the upright over, placing a small wooden block underneath it. Screw wedges tightly against the upright around this wooden block.
Finally, drill through the wooden block and into the upright, inserting the drill bit through the EXIT hole.

That’s it, your template is ready.
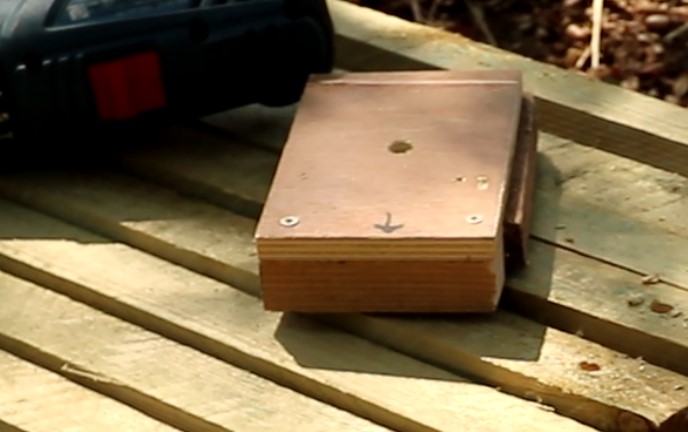
Now finish drilling the holes in the uprights using your template, trying to drill as straight as possible.
Make a clear mark on the side where you inserted the drill bit: this is the side that will be placed against the connectors, as it is the most accurate side.
Insert the bolts into the holes. Pay very close attention to the direction of insertion: insert the bolts from the EXIT side of your drill bit. This way, the end of the bolt is on the entry side of your drill bit, and it is this side that will be against the connector.
Use the hammer to help ensure the square end of the TRCC bolts sits firmly in the wood.
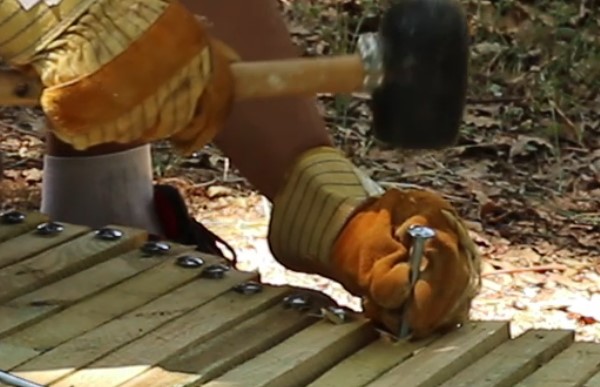
Tip: if the hammer isn’t enough, you can use a screw and washer and tighten the bolt so that it sits firmly in the wood.
Where can you buy the necessary equipment?
If you have any tips to share about buying materials, please do write to me and I’ll post the best deals here!
Timber
In France, you can find wood at reasonable prices without having to haggle at the major DIY chains: Castorama, Leroy Merlin, Brico Depot… I find that specialist suppliers are sometimes much more expensive than the major DIY chains, unless you have an account with them and are prepared to negotiate at length.
Bolts
For bolts, I’ve found the best prices in Europe at Auprotec (website), with fast delivery and reasonable prices.
TIP: it’s often worth buying 100 bolts rather than 50 because of their volume-based discount policy.
Direct link to TRCC bolts (round head, square neck)
Once the dome is assembled
Wood screws to prevent slipping
Your bolts are held in place by compression and, over time, they may come loose and the connectors will start to rotate. To prevent this unwanted rotation, I recommend adding at least 3 wood screws per connector as follows:
How do you fit a door into a geodesic dome?
I have no experience with dome doors, but on this page I’m sharing my ideas on how I would go about fitting a door into my domes.
It is, however, easy to remove one upright from the first ring to create an easy passage:
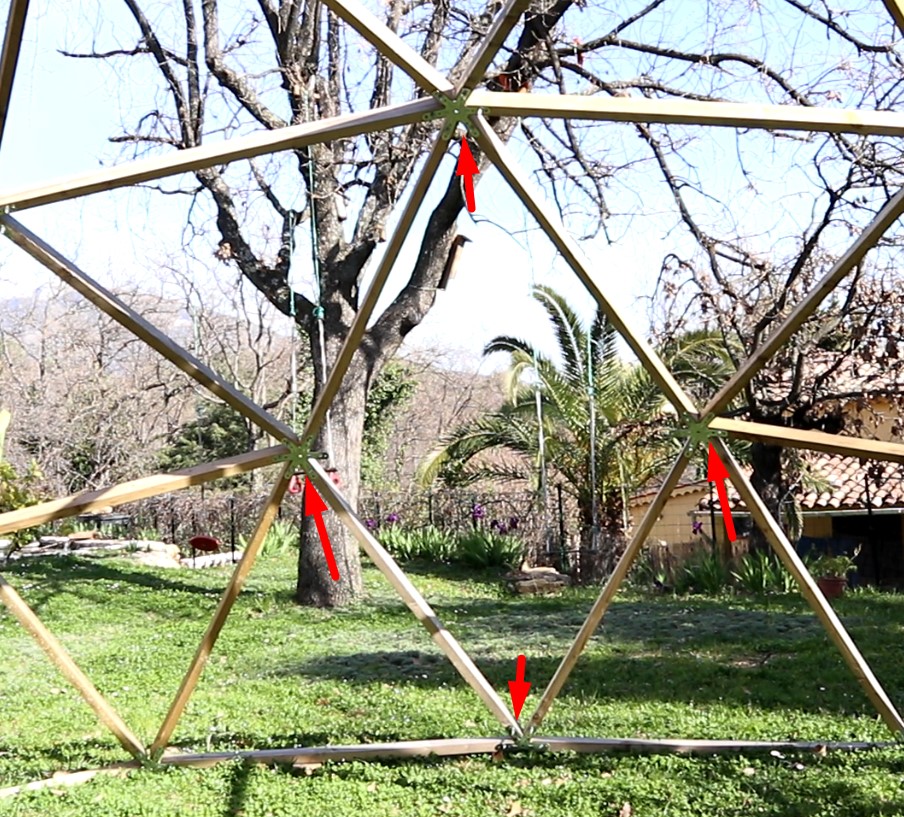
In such cases, I recommend reinforcing the structure by adding wood screws into each empty hole in the four connectors around your new opening.
Remove this strut once construction is complete: not whilst building.
Domestar FAQ
In this section, you’ll find answers to the questions I’m most frequently asked, such as what size dome to use for a particular type of connector, or how to cover geodesic domes.