Video of HEXDOME 5/8 geodesic dome assembly – Truncated Icosahedron
Achetez Domestar en direct sur: / Purchase Domestar directly on: / Compre Domestar directamente en: / Acquista Domestar direttamente su: / Domestar direkt kaufen bei:
DOMESTAR Fréquence 1

![]() Deutsch |
Deutsch | ![]() English |
English | ![]() Espanol |
Espanol | ![]() Français |
Français | ![]() Italiano
Italiano
DOMESTAR Fréquence 2

![]() Deutsch |
Deutsch | ![]() English |
English | ![]() Espanol |
Espanol | ![]() Français |
Français | ![]() Italiano
Italiano
DOMESTAR Fréquence 3 (3/8)
![]() Deutsch |
Deutsch | ![]() English |
English | ![]() Espanol |
Espanol | ![]() Français |
Français | ![]() Italiano
Italiano
DOMESTAR Fréquence 3 (5/8)
![]() Deutsch |
Deutsch | ![]() English |
English | ![]() Espanol |
Espanol | ![]() Français |
Français | ![]() Italiano
Italiano
DOMESTAR Fréquence 3 KRUSCHKE (3/8)
![]() Deutsch |
Deutsch | ![]() English |
English | ![]() Espanol |
Espanol | ![]() Français |
Français | ![]() Italiano
Italiano
DOMESTAR Fréquence 3 KRUSCHKE (5/8)
![]() Deutsch |
Deutsch | ![]() English |
English | ![]() Espanol |
Espanol | ![]() Français |
Français | ![]() Italiano
Italiano
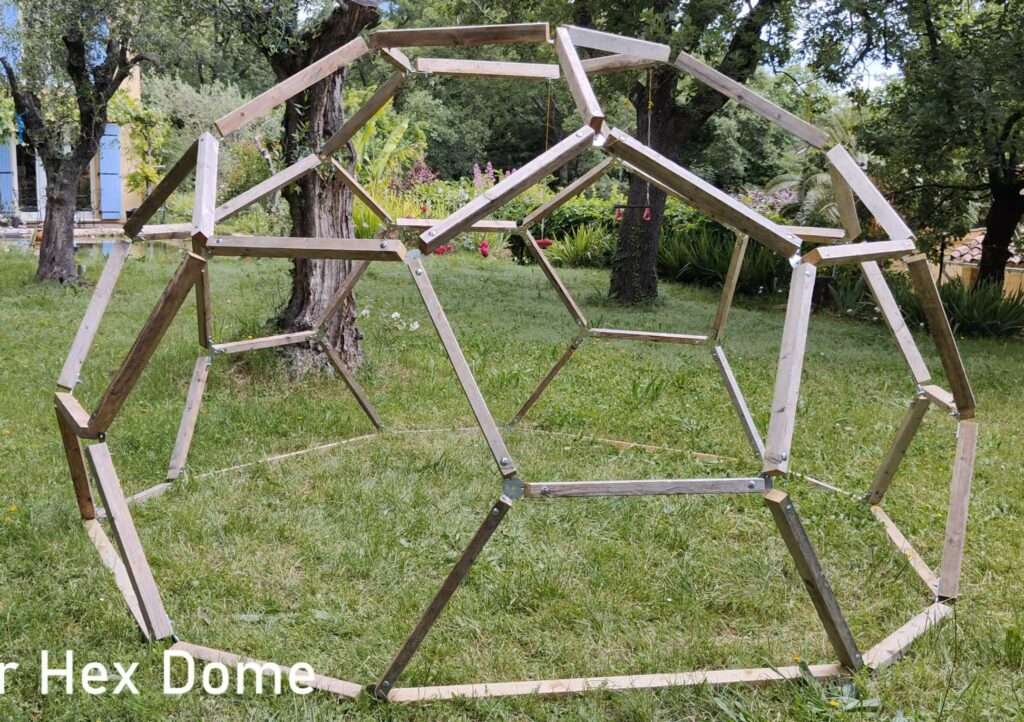
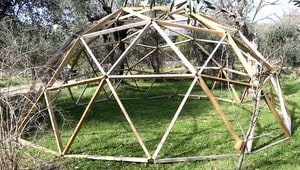
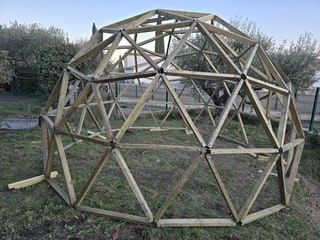
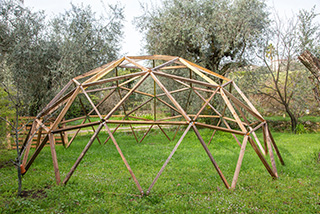
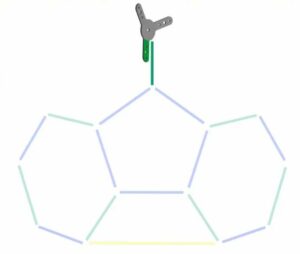
DOMESTAR HEXDOME (5/8)
![]() Deutsch |
Deutsch | ![]() English |
English | ![]() Espanol |
Espanol | ![]() Français |
Français | ![]() Italiano
Italiano
Domestar Fréquence 4 (1/2)
Deutsch | English | Espanol | Français | Italiano
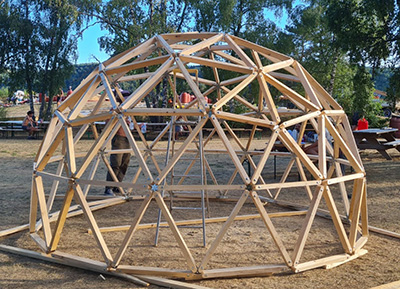
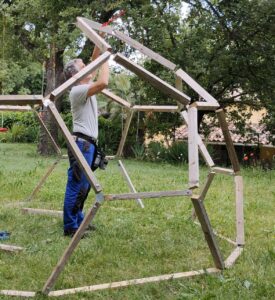
Welcome to the assembly instructions for the geodesic dome using DOMESTAR HEXDOME Frequency 5/8 connectors. If you have any questions, click on Contact to get in touch with me: I’ll be delighted to help you.
Save / Print this page as PDF:

Equipment required
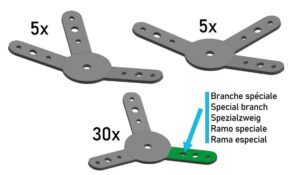
- Set of 40 DOMESTAR HEXDOME Frequency 3 5/8 connectors
- 60 wooden uprights (joists) in 2 sizes (see size calculation table below)
- 120 bolts: screws and nuts. I strongly recommend TRCC bolts (round head, square neck): one blow from a hammer and they’ll lock into the wood and won’t turn when you tighten them
- 120 wood screws, size 5×50 or 5×40
What does the 5/8 in HEXDOME 5/8 mean?
Frequency 3 geodesic domes come in 2 formats: 3/8 and 5/8 (sometimes also called 4/9 and 5/9 or even 5/12 and 7/12: it’s just a habit! The 3/8, 4/9 and 5/12 domes are all exactly the same).
This is the division of the sphere:
- 3/8: a little less than half the sphere
- 5/8: a little more than half the sphere. These domes are one level higher than the 3/8 domes, so they are taller.
Tools required
- tools for cutting the studs: ideally a radial saw, otherwise a circular saw or jigsaw
- a drill a drill bit the thickness of the screws
- a spanner or ratchet to tighten the bolts, or an impact screwdriver (note: an impact screwdriver is NOT a percussion drill. With an impact screwdriver, you can screw or bolt much more strongly and quickly) or a simple screwdriver
- a hammer to drive in your TRCC bolts.
- depending on the height of your geodesic dome: bench or ladder
Size of your screws and bolts
The bolts must pass completely through the thickest side of the upright and the connector. I therefore advise you to choose a bolt length around 20 mm longer than the greatest thickness of your wood.
If your bolts are less than 10mm longer, assembly will be much more complicated.
FOR EXAMPLE, if your wood is 40x70mm, you will need to drill through 70mm. So use an 80mm or 90mm bolt.
For thickness, I recommend 8mm bolts (=M8)
I recommend using bolts rather than screws. The assembly is much more solid, as the bolts go through. But above all, dome assembly will be easier.
Choosing the size of your dome
To assemble your dome you will need:
- 55 small uprights
- 5 large uprights
The size of the uprights will determine the size of the dome. Height, radius and diameter are therefore determined by the length of the uprights.
Explanations:
For a geodesic dome of 2m radius (4m diameter) I must therefore cut:
- 55 small uprights of 0.747m (=74.7cm)
- 5 large uprights of 1.434m (=143.4cm)
Which wood should be used for the geodesic dome uprights?
I recommend using construction or decking timber that offers good strength at a fair price.
The MINIMUM length and width of the uprights should be 30mm to ensure the stability of the structure.
Decking joists are very attractive, with dimensions of around 62x38mm or 70x45mm. The joists are also often treated to class 3 or class 4, giving this wood very good resistance to rain.
Construction rafters / half-rafters (on building superstore websites, type in “construction timber”) are often even cheaper and thicker with dimensions of 75×50, but their treatment and rain resistance is often inferior (generally class 2 – this is yellow-coloured wood)
TIP: choose your own wood from the big building stores. Check that the wood is not twisted or warped. Twisted joists will make assembling your geodesic dome much more difficult!
TIP: If you plan to treat the wood, I advise you to do so after cutting the wood but before assembling it: it will be easier to paint/spray the wood flat than once the geodesic dome has been assembled.
TIP: buy a few extra large uprights: they will be needed to support the high levels of the dome during construction.
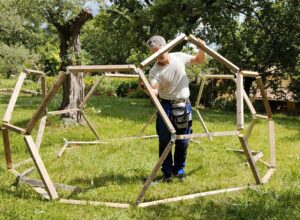
My experience of assembling the domestar HexDome
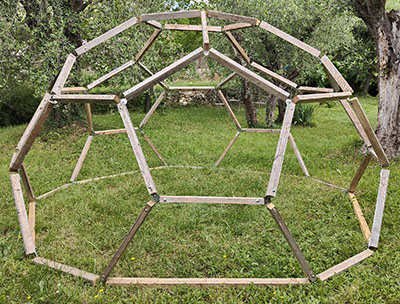
The HEXDOME dome is not based on triangles like traditional geodesic domes: it is composed of hexagons and pentagons. It is therefore less solid than triangular-based domes and should be preferred for light use.
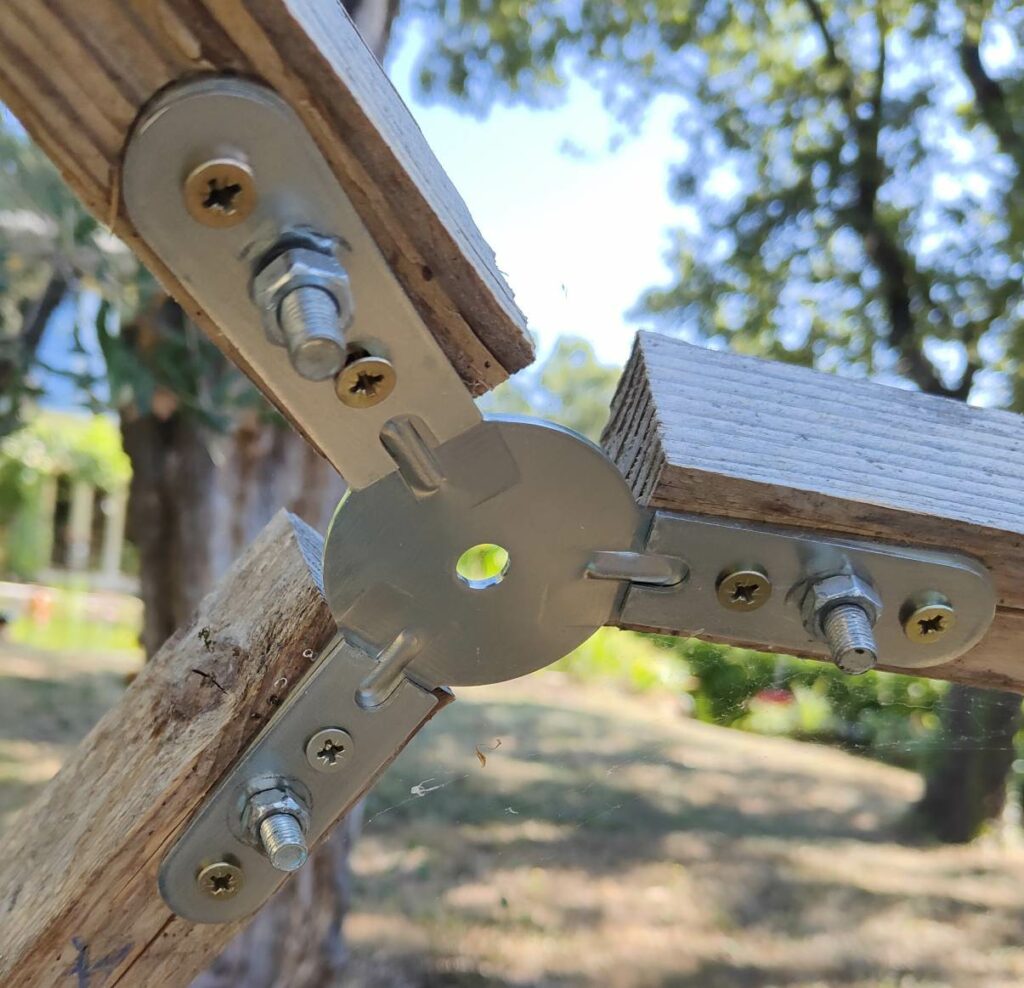
IMPORTANT: To maintain the shape of the structure as much as possible, it is essential to use 3 screws in each connector branch: the large central bolt and 2 wood screws on either side. If you do not use these 3 screws on each branch, the dome will flatten over time.
Preparing to build the geodesic dome
During this preparation phase we will:
- Cut out the uprights
- Drill all the uprights
- Insert all the screws
Prepare the location for the geodesic dome
Once you have determined the diameter of the geodesic dome using the table above, make sure that you have enough space for your dome and that this space is flat enough.
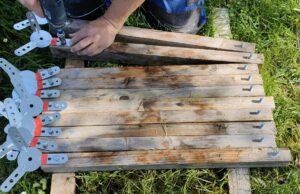
Cut out the uprights
Start by cutting out the first upright and checking that its length corresponds exactly to what you wanted.
Use this first upright as a template: trace the cutting line using this upright on the wood to be cut. Remember to cut just after the cutting line, not on the cutting line, to allow for the thickness of the blade.
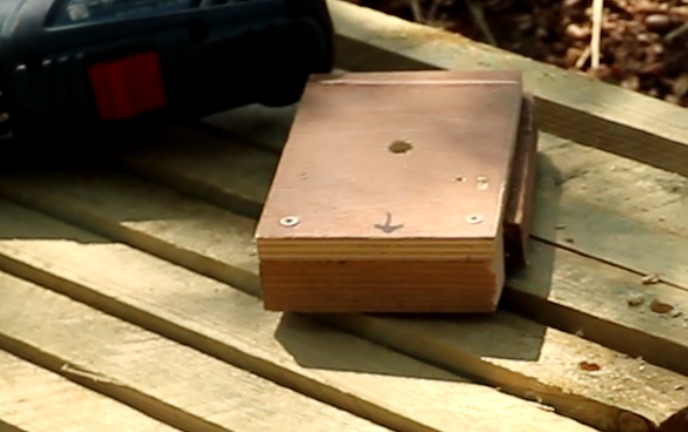
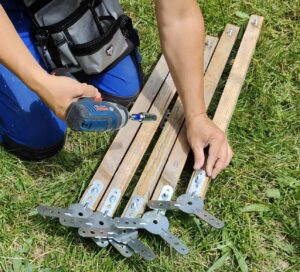
Drill the uprights
Now you need to drill the uprights to accommodate the bolts. Here again, great precision will help you during assembly.
The bolt hole should be 40mm from the end of the upright.
You need to drill through the LONG side of the upright to ensure maximum stability for the dome.
Make a drilling pattern for greater precision
I strongly recommend that you create a drilling template.

Make your first hole very precisely on one side of the first stud.
Mark the side from which your drill bit entered: as you risk not drilling straight through, only the side where you started drilling is accurate. The exit side is likely to be off. This isn’t serious, but to be accurate you need to base yourself on the entry side.
Now turn the upright over and place a small piece of wood underneath. Screw shims tightly against the jamb around this wooden plate.
Finally, drill the wooden plate through the jamb, entering the drill bit through the EXIT hole.

That’s it, your pattern is ready.
Now finish the holes in the uprights, using your template and trying to drill as straight as possible.
Mark the side where you put the drill bit in: this is the side that will be placed against the connectors, as it is the most accurate side.
Insert the bolts into the holes. Pay close attention to the direction of insertion: insert the bolts through the OUTPUT of your drill bit. This way, the end of the bolt is on the same side as the entrance to your drill bit and this is the side that will be against the connector.
Use the hammer to ensure that the square part of the TRCC bolts penetrates the wood.
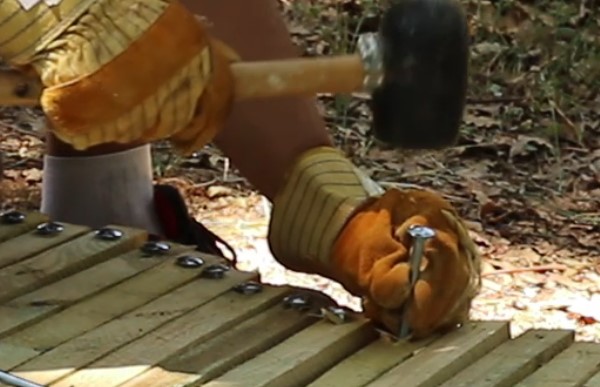
Tip: if the hammer isn’t enough, you can use a screw and washer and tighten the bolt so that it goes into the wood.
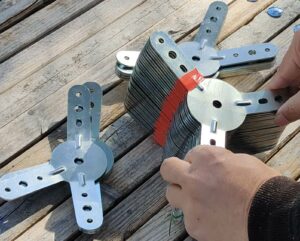
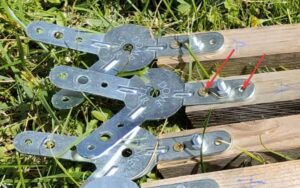
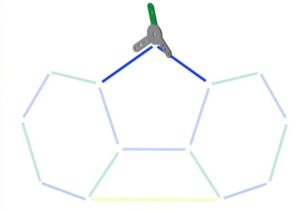
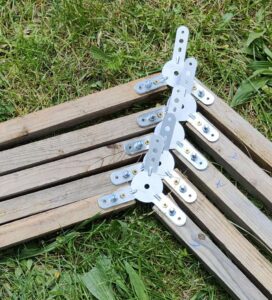
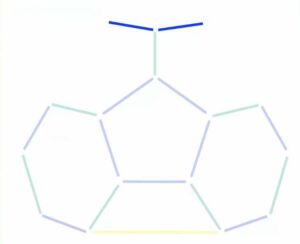
Presentation of connectors
In your Domestar pack you’ll find 3 types of connector.
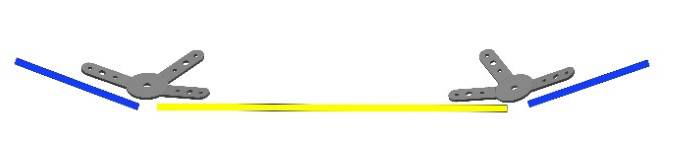
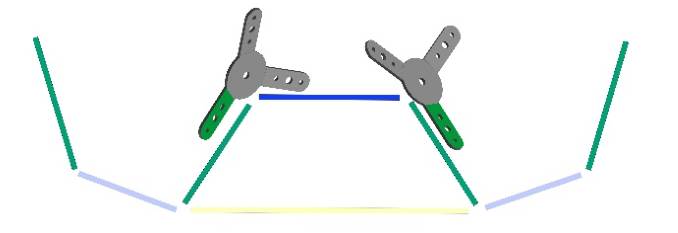
The Y-shaped connectors are for the base.
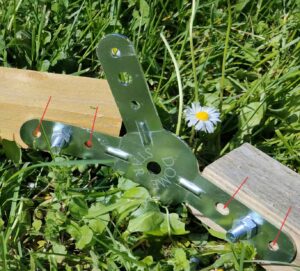
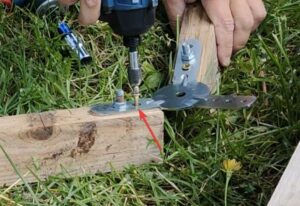
Locate the special branch
The others have a meaning. Make sure you find the branch with the oval shape: this is the special branch. For this tutorial I’m using a prototype where all the branches have an oval. On the final model only the special branch has an oval, so for the tutorial I’ve added a red sticker to this branch so that you can spot it.
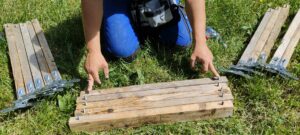
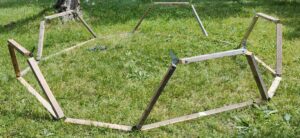
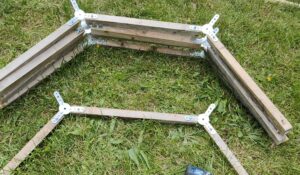
The base
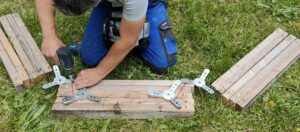
Screw the Y connectors on either side of 5 small uprights, as shown below:
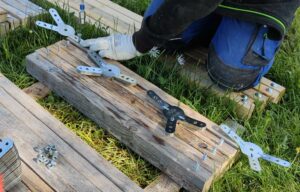
It’s very important to add 2 wood screws to all the branches for extra strength:
Lay these 5 uprights in a circle with the connectors screwed on top, inserting a large upright between each of them:

Screw all the uprights in the base, not forgetting to add wood screws in the free holes:
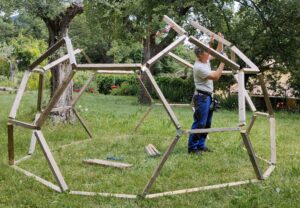
First level
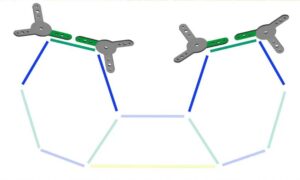
Prepare 10 uprights (normal – you’ve already used all the big uprights!) and 10 connectors on the floor.
Screw the special branch (the one with the oval) onto each of the uprights, and as always, add 2 wood screws per branch:
Take 5 new uprights. Place the 10 uprights above to the left and right of these 5 uprights and screw them in (don’t forget the wood screws):
Here are the sets of 3 uprights ready to be fitted (unlike this image, remember to use 2 wood screws per branch):
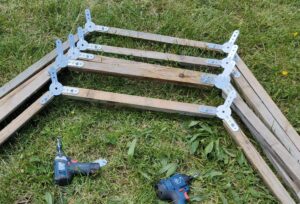
And screw these sets of 3 uprights to the base where the large uprights are:
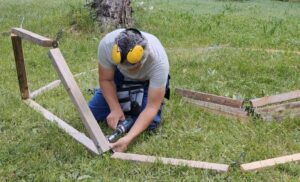
Second level
This time screw the special branches on either side of 5 small uprights:
And screw a new upright to each of these uprights on either side:
And screw these arches onto the dome:
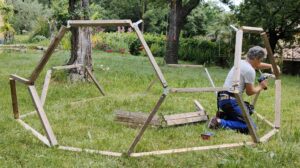

Third level
Build 5 hats with the special branch facing upwards (so not screwed on yet):
And install these hats on the dome:
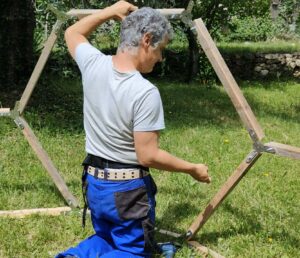
Fourth level
Screw the special branch of the DOMESTAR connector onto 5 uprights:
And install them on the dome:
As you install these uprights, also install the upright of the final pentagon:
And that’s it! Check that you have put wood screws in all the holes and enjoy your DOMESTAR dome!
